Practice Chanter Differences
Discover The Differences In Practice Chanters
This blog is not sponsored and the opinions expressed are my own. If you would like to sponsor one of my blogs or videos, I would be happy to discuss sponsorship opportunities.
All content, opinions, photos, by Wheaton McClanathan

First it is important to point out that you should never purchase a practice chanter or anything for your bagpipe if the item does not bear the name of a trusted bagpipe company. Check out my blog on “How to choose your first practice chanter” to see a list of trusted bagpipe makers.
We already covered the difference between wood vs. plastic, and the 3 different sizes of chanters.
Here is what’s next!
Holes
Connections
Reeds
General Care
1. Counter sunk holes vs. standard drilled holes:
The 2 most popular “styles” or “types” of holes in a practice chanter are standard, and countersunk. A standard hole is just that… standard, meaning the drill bit went into the chanter, made the hole, and came out leaving a sharp edge around the hole. A countersunk hole has a beveled edge around the hole. The concept of counter sunk holes is to create the feel of a larger hole without compromising the sound of the chanter. Since the pipe chanter (used on the actual bagpipe) has larger holes than the practice chanter this method makes a lot of sense. A lot of my beginner students do feel that the counter sunk holes are easier to feel/find.
Which one is better?
Like most things, it depends on personal preference. Since the sound isn’t different – it depends on which feels more natural as you play. I recommend my new students purchase a ‘McCallum Bagpipes’ brand standard size all plastic chanter (stock # PC2) or the long version of the same chanter (stock # PC4) which does have counter sunk holes but I personally play on a vintage R.G. Hardie blackwood chanter which has standard holes.

Notice the sharp edge around the holes on the vintage R.G. Hardie chanter versus the countersunk holes on the McCallum chanter.
“Little known fact! A bespoke bagpiper maker out of Ithaca, New York named Mark Cushing created what I believe is the first ever practice chanter that feels like a pipe chanter. The holes are not countersunk or standard, he used a method that gouges out the hole so that it matches the size and feel of the pipe chanter holes, very innovative! I’ve spoken to Mark and even had him do some repairs and custom work (scroll down to see photo of my custom bagpipe shifter knob) for me in the past but when I reached out to him to interview for this blog I sadly learned that his site is down and he is not making bagpipes anymore. ”
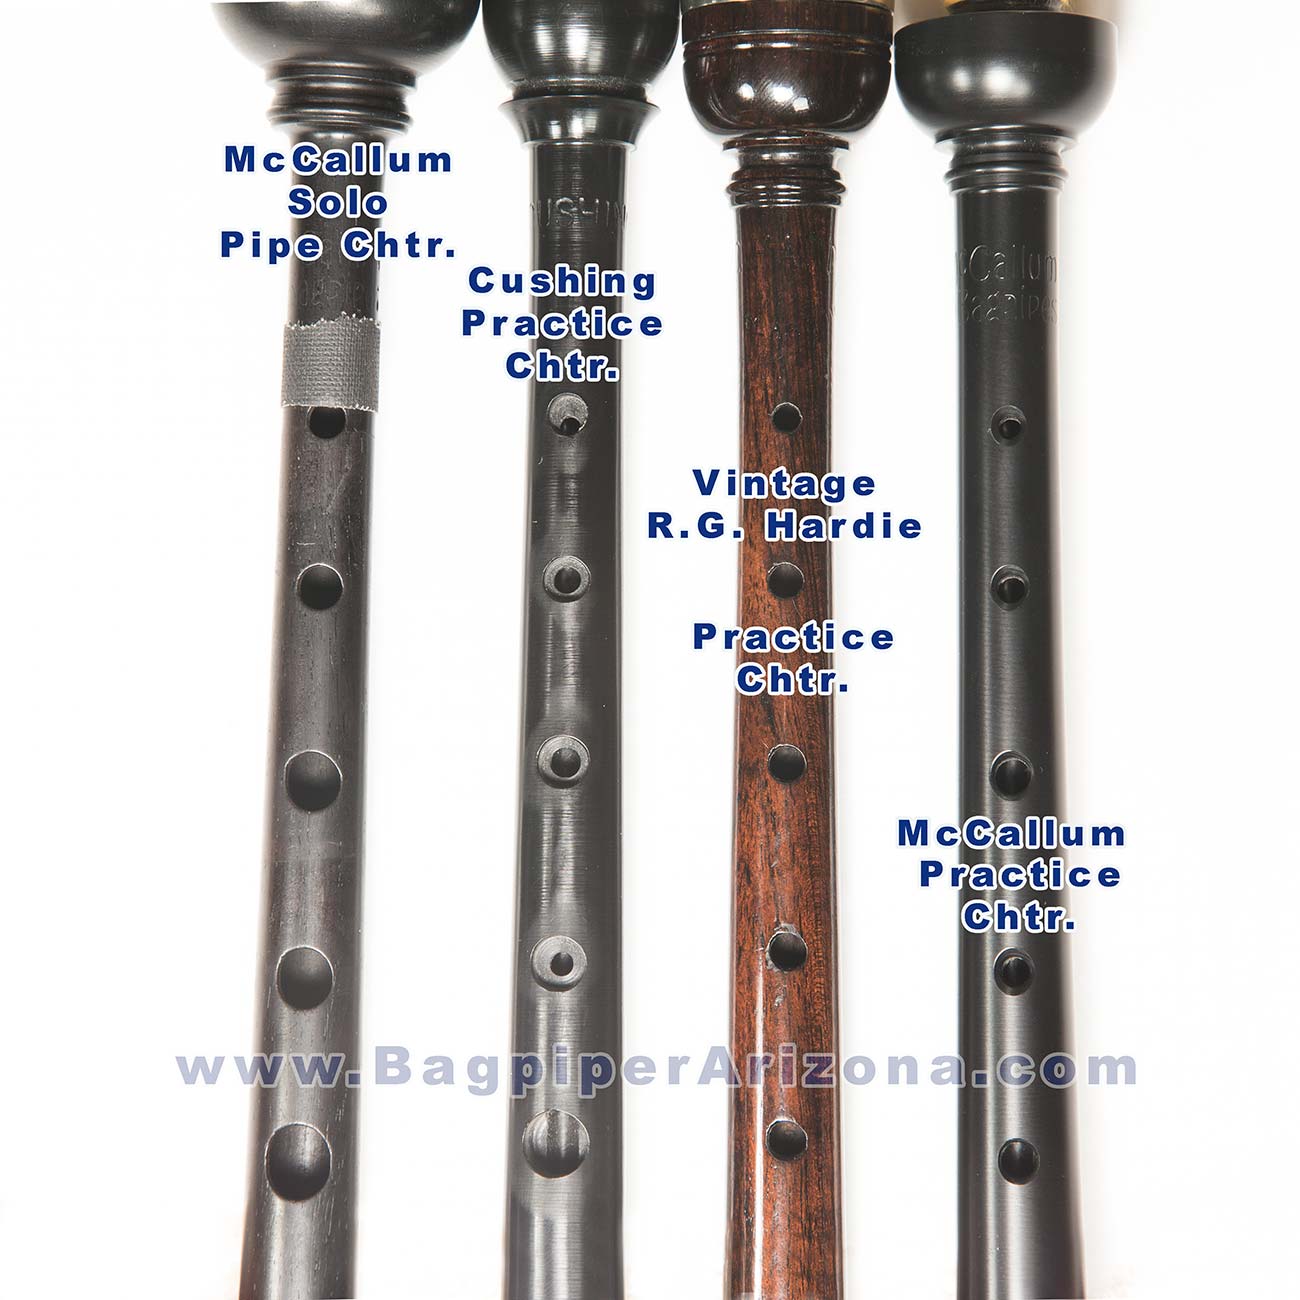
Compare a pipe chanter (left) to 3 practice chanters.
2. Rubber o-ring vs. wrapped connection:
Most bagpipe makers use the standard traditional style wrapped connection on practice chanters, by wrapping the chanter joint with a waxed hemp string it makes the 2 pieces (chanter top and chanter bottom) cling together tightly. A few makers have converted to a rubber o-ring connection for the 2 pieces. The rubber o-ring connection requires zero maintenance versus the wrapped style that needs to be occasionally adjusted to fit the chanter top.
Which one is better?
In my opinion, the o-ring system is nice and clean but does require occasional application of lubricant (an ultra thin dab of Vaseline, or Aquaphor) on the inside of the chanter top in order to make the top slide off gently. With a wrapped connection you can dial-in the perfect tightness which is why I prefer this style a little better.

3. Reeds for your practice chanter:
When you buy a practice chanter, it should come with a reed that is matched with the chanter, always buy a spare or three. A standard size chanter and a youth chanter require a standard practice chanter reed. A long practice chanter requires a long practice chanter reed. How do you tell the difference between a long and standard reed? It may sound simple enough, but it is actually very hard to tell the difference just by looking at the reed, playing it is the best the way to discover what type of reed it is. Why-in-the-world reed makers don’t always put their name/strength/type on their reeds just boggles my mind. There are some who put their name on their pipe chanter reeds but I’ve only seen one reed maker who puts his name and the reed strength on his reeds.
Almost all practice chanter reeds are plastic with the exception of a few reed makers still making them out of cane. Chris Apps is a Scottish reed maker living in St. Louis that makes some of the best pipe chanter reeds as well as real cane practice chanter reeds. I recently bought and tested his various reeds, details to come soon! Check out his website here. www.https://appsreeds.com
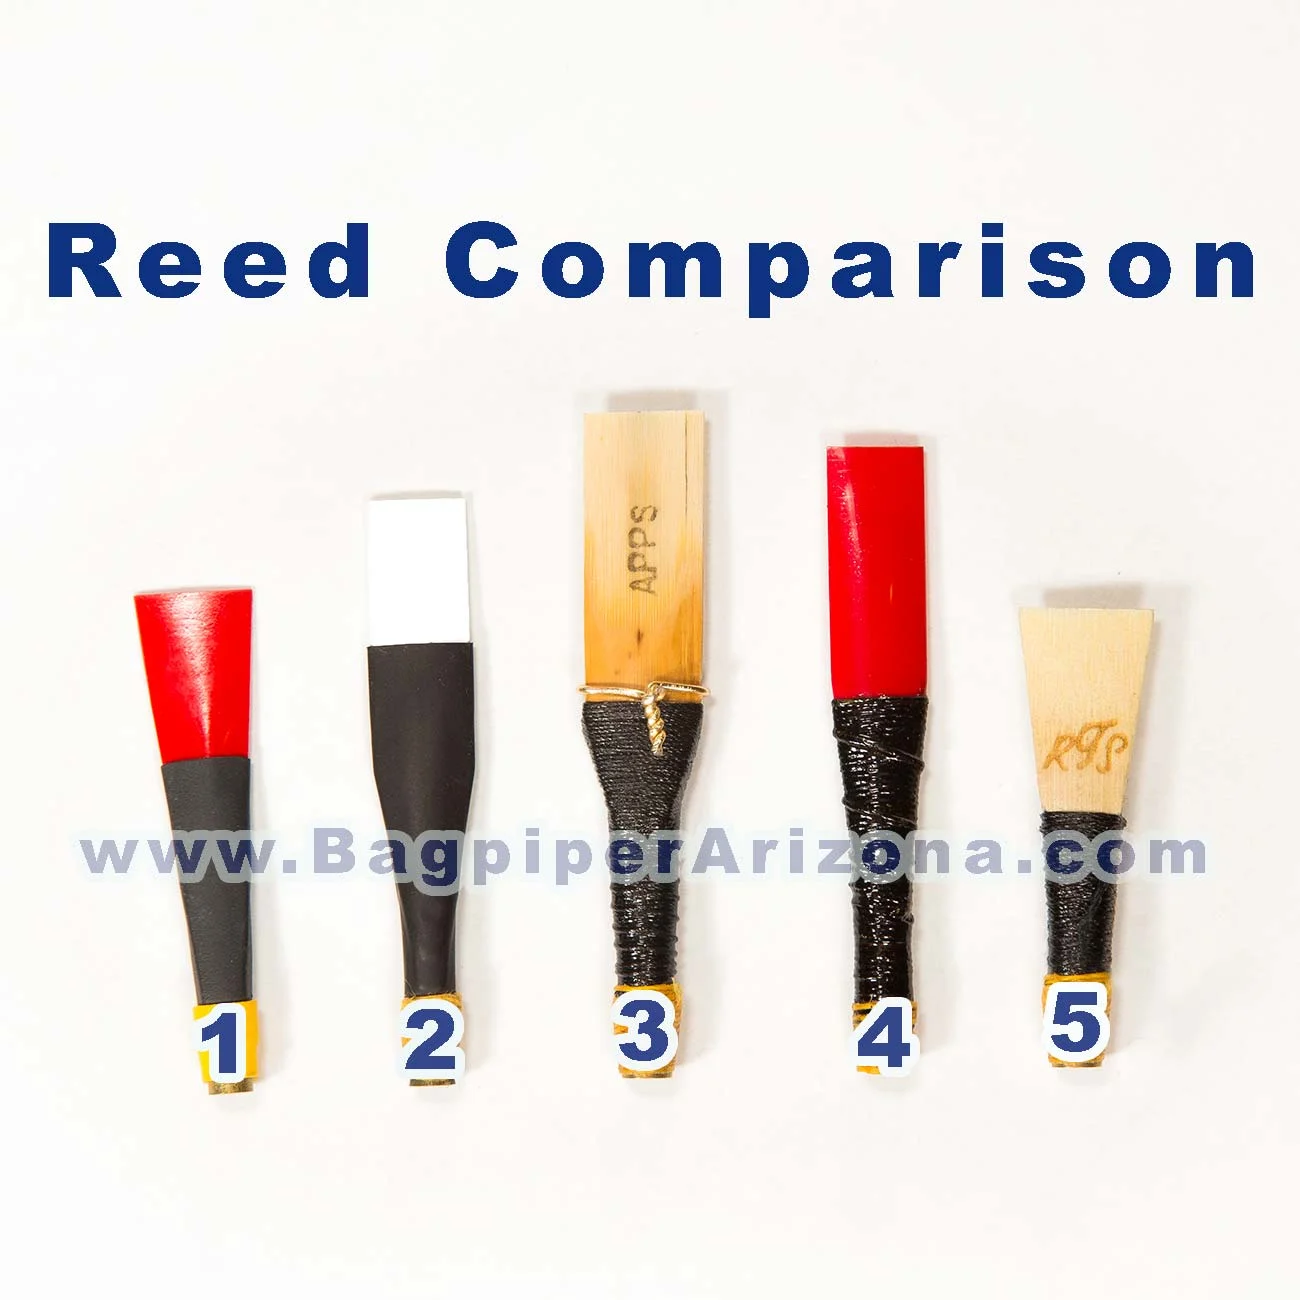
1: McCallum Std. Practice Reed / 2. Shepherd Std. Practice Reed / 3. Apps Cane Practice Reed / 4. Warnock Std. Practice Reed / 5. Shepherd Pipe Chanter Reed (for the actual bagpipe, not practice chanters)
4. Tuning and Care for your practice chanter:
Practice chanters are very low maintenance. If your chanter is plastic, all you need to do is make sure you take apart the two pieces, and remove the reed after playing it so it can air dry. If yours is wooden, you’ll also need to be sure to take it apart and let it air dry but also oil it once or twice a year with a light coat of almond oil. Practice chanters that are not disassembled after playing can grow mildew! Once its dry, it can and should remain assembled as to protect the reed.
The reed is the fragile part of the practice chanter. Every time you remove the top and put it back on you run the risk of bumping the reed edge. The reed can take quite a few bumps but eventually knocking it with the chanter top will kill the reed which is why it is always good to have a spare.
In general, pipers do not tune their practice chanters like they do their pipe chanters. Practice chanters are generally in-tune enough to sound right and get the job done. If the chanter sounds really out of tune, scratchy, or cuts out all the time, it is likely time to replace the reed versus attempting to tune the chanter. If you are a beginner and your reed is new with no visible damage but keeps cutting out, try blowing with less pressure.

Until next time! Get out there an learn a new tune!
Enjoy a photo of my custom made shift knob inside my 5th Gen 4Runner. I worked directly with Mark Cushing on this project. The standard size of a real bagpipe tenor top section was just too long for a shift knob so Mark scaled the size down and threaded the bore to match the Toyota threading. He even stamped his name inside the drone cords groove which is my favorite part!
